The Blackboard Alphabet for Embroidered Projects: A Designer's Review
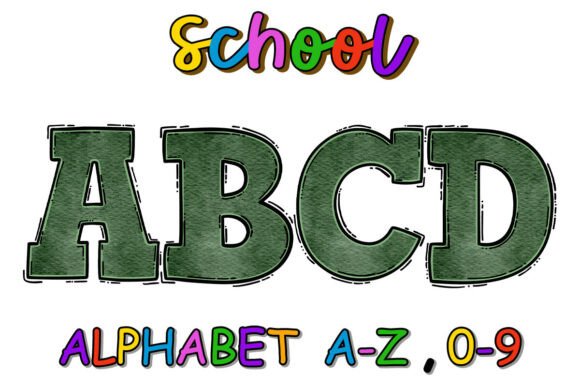
When a new embroidery file lands on my desktop, I don't just open it. I imagine it stitched. I think about the fabric it will live on, the hands that will wear it, and the practical realities of turning a digital graphic into a physical, thread-based creation. Today, I’m looking at the School Blackboard Alphabet Letters design, and I’m already picturing it on the corner of a cozy cotton apron or the front of a canvas tote bag.
First Impressions: Vintage Charm with Modern Craft Utility
The design immediately evokes a warm, nostalgic mood. It’s not a harsh, formal alphabet; it’s playful and slightly imperfect, like chalk on a real slate. That visual personality is its greatest asset. For embroidery, this means it naturally belongs to projects with a handmade, personal feel. I wouldn’t use this for corporate logos, but for a baby’s name on a nursery blanket, a family surname on a holiday kitchen towel, or a sweet message on a personalized gift sweatshirt, it’s perfect. The theme lends itself to craft business items that tell a story—think boutique products, Etsy listings for teacher gifts, or custom apparel for a rustic wedding.
Where This Alphabet Shines in Real Embroidery Projects
In practical use, this design’s strength is its versatility for custom apparel and handmade products. Imagine a simple, unisex cotton cap with a single initial embroidered on the front. The blackboard style makes it interesting without being flashy. On a heavyweight sweatshirt, the letters would hold up visually against the fabric texture. For a craft fair staple like an embroidered tote bag, spelling a full name or a short word like “CREATE” would create immediate buyer engagement due to its friendly, recognizable aesthetic.
It’s also ideal for smaller, decorative accents. Consider a set of embroidered patches for a baby’s jacket, each with a different letter. Or a line of text on a pillow cover for a reading nook. The design adds value because it feels intentional and crafted, boosting customer trust in the handmade presentation. For digital product sellers, this alphabet works beautifully in printable mockups for baby clothes or aprons, giving potential buyers a clear sense of the finished product.
Scenarios to Approach with Care
While charming, the chalk-like detail requires thoughtful application. On very small hoop sizes, the finer irregularities in the letter shapes might not stitch with clarity, becoming muddy. I’d be cautious on highly textured fabrics like certain towels or nubby blankets, where the fill stitch areas could lose definition. Similarly, on stretchy fabric or thin t-shirts, using a proper stabilizer is non-negotiable to maintain the design’s shape after frequent washing.
Another consideration is dark fabric backgrounds. If the design file is meant to be stitched as a positive image (white chalk on black), you’ll need excellent thread color contrast—a bright white or cream. Always test it in black and white mockups first to understand how it translates. For curved surfaces like caps, inspect the small details and corners; a simpler letter might adapt better to the curve than a more ornate one.
How This Design Translates to Stitching & Business Value
The true test of any embroidery file is how it affects the final product’s appeal and professionalism. The School Blackboard Alphabet Letters, when stitched well, enhances stitching clarity by offering distinct, open letterforms. This isn’t a dense, blocky font; it has space, which helps with stitch density and prevents puckering. That directly impacts product value—a clean, well-executed embroidery job using a charming design feels premium.
For creative entrepreneurs, this alphabet can aid brand consistency if your shop specializes in vintage, educational, or heartfelt goods. A customer receiving a personalized baby item with this embroidery is likely to perceive it as a thoughtful, giftable piece. It encourages recognition and repeat business because it stands out from generic, machine-made fonts.
Essential Designer Notes Before You Hoop the Fabric
My standard advice for any new design applies here doubly, given its stylistic details.
- Test on scrap fabric first. Use the same material you plan for the final project. Check thread color contrast and see how the satin stitches or fill stitches render the chalk-effect edges.
- Review the design at the intended size on your machine. Does it fit your planned hoop size? Are the smallest details still clear?
- Compare how it looks on both light and dark background mockups. This informs your thread palette.
- Always use the correct stabilizer for your base fabric. This design’s integrity depends on it.
- Crucially, confirm the licensing terms of the digital file. Before selling finished items like custom apparel or embroidered patches in your small shop, or using it in commercial embroidery projects, ensure your use is permitted.
Don’t assume compatibility; check the provided information. If specifics like exact file formats for machine embroidery design aren’t listed in the product description, reach out to the seller. Knowing whether it’s ready for an embroidery machine or needs adaptation is a fundamental step.
The Final Stitch: A Design for Purposeful Projects
The School Blackboard Alphabet Letters is more than a graphic; it’s a design asset with a specific mood and application. It won’t be for every project, but for the right one—a personalized gift, a boutique product, a craft business item with a story—it’s a fantastic choice. It brings a human, friendly touch to embroidery, moving away from cold precision toward warm craftsmanship. As a designer, that’s a value I appreciate. It reminds us that embroidery, at its best, connects people through texture, story, and thoughtful detail. Hoop it, stitch it, and let that chalkboard charm speak for itself on a well-made finished product.